do you need to set the start of the drawing exactly at the origin of the model? Well you are in the right place!
You can have the origin of you drawing coincident with the origin of the axis in two ways:
– place the start of the axis with the UCS command: but it doesn’t place the drawing in the REAL ORIGIN
– find the REAL 0,0 coordinates and put there the start of your drawing. How? Continue to read…
How to find the real origin of the model
In the new versions of Autocad software, the “real” origin always remain the same, even if you move your drawing or move the axis with ucs. So:
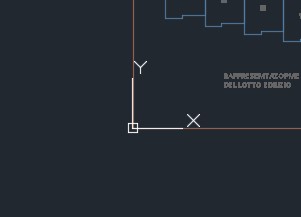
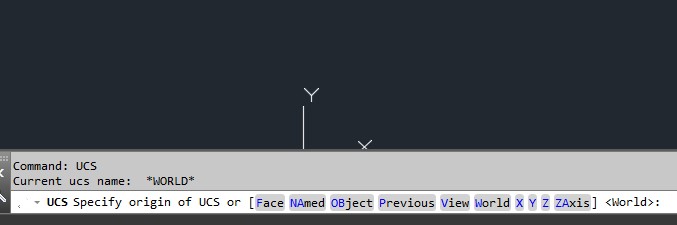
– the first step is to establish the axis in the real origin: WRITE UCS, SELECT WORLD in the command list, and press enter.
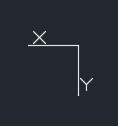
– to follow also the axis direction – in case you visualize it in a different way than the standard – write _PLAN and click enter
– now your drawing is somewhere in the space and the origin is the original one (sorry for the word game). Rotate your drawing if you need to follow the direction of the axes.
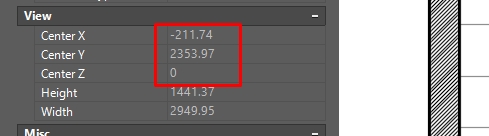
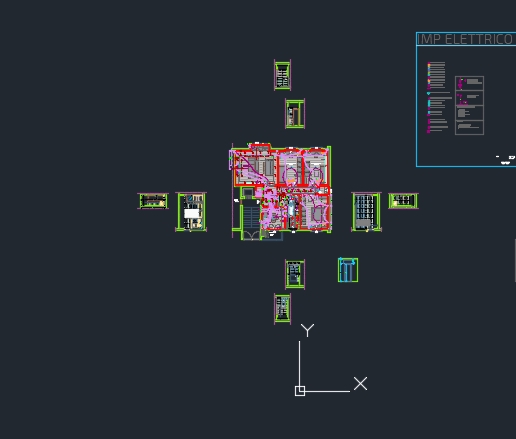
– While you are visualizing your drawing, click on properties. You will have the coordinates of your current view. In the photo below, we are on the left of the origin of the x-axis, and above the origin the y-axis. Luckily all the drawing lays on the x-y plan, because Z value is 0
– if Z value isn’t zero, select everything and write: _FLATTEN. Save the file, it could take some time and generate errors.
– move the whole drawing until you are very close to visualize low numbers of x and y, and above all until the ucs stops in a point of the screen, instead of being in the left corner of the drawing
– activate your snap into the grid and move everything towards your origin, in the point you desire.
voilà!
Disclaimer: this is a fast guide, a tutorial, an how-to article that I personally wrote for you. Feel free to write here any kind of suggestion! It is helpful if you need to solve your problem, if you need a tip or if you are in trouble and you need an help!