
Have you taken several photos with a professional camera in your last trip, and now it is time to show them in the socials? Or to your design project and you want to present it to the class?
There are several commands in photo editing software (as Photoshop) for the correction of lens effects, whether you have a raw or jpeg jpg file. They are very powerful, and in some cases, the effects are truly interesting. Try it!
Let’s see how to do it: you can find main commands in the filter submenu:
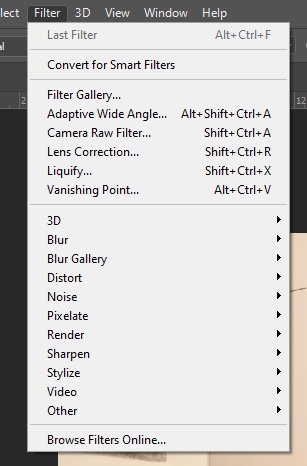
What we can use about this are: CAMERA RAW FILTER AND LENS CORRECTION
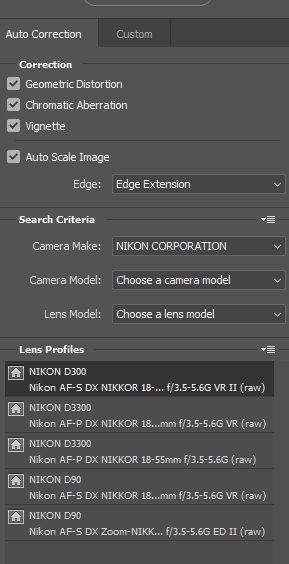
Lens correction (see below) is very useful to correct the geometric distortion and chromatic alteration (vignetting incluse). Very powerful, and you won’t imagine how the image will look after this, especially for interior photography, where often a 18mm focal length is used.
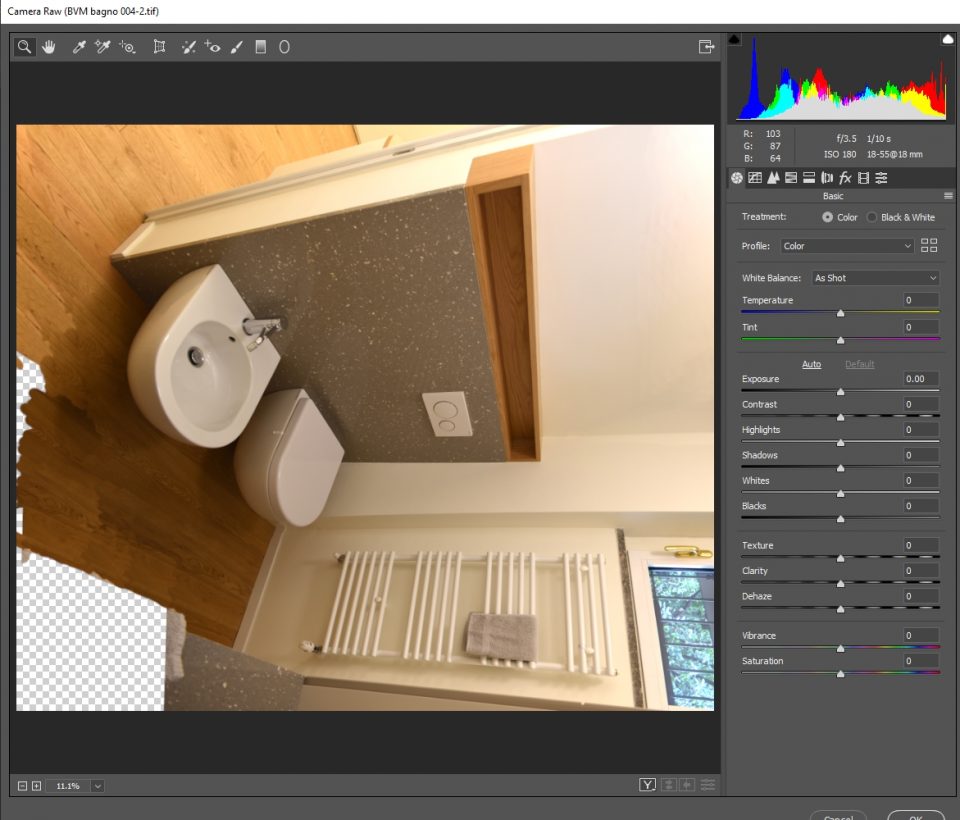
Camera Raw (see below) is more focused in the chromatic appearance of the photo. It has commands for the geometric effect too, but in my opinion the previous tool is more right for that case. What is the difference with Camera Raw and the use of adjusting levels and filters in the main board? With Camera Raw the management of the image appears deeper, more radical, not like a superficial application above the image. It is like many details you can’t actually see could become evident with the regulation of some parameters, as the image contains more data you don’t see. There is less loss of data.
Just a warning! These are very precious and powerful tools. But, compared to layer filters, they are less flexible and adjustable. It is easy to loose previous settings or the original appearance in many cases. It is extremely important to work with a copy of your original photo.
Disclaimer: this is a fast guide, a tutorial, an how-to article that I personally wrote for you. Feel free to write here any kind of suggestion! It is helpful if you need to solve your problem, if you need a tip or if you are in trouble and you need an help!